What went wrong
The mistakes are the useful part. Each one has what happened, why, and the fix that's now in the print file, so you can skip it.
- 21 so far
- 12 found on a real print
- 9 caught before printing
-
The screen lip drooped
- What happened
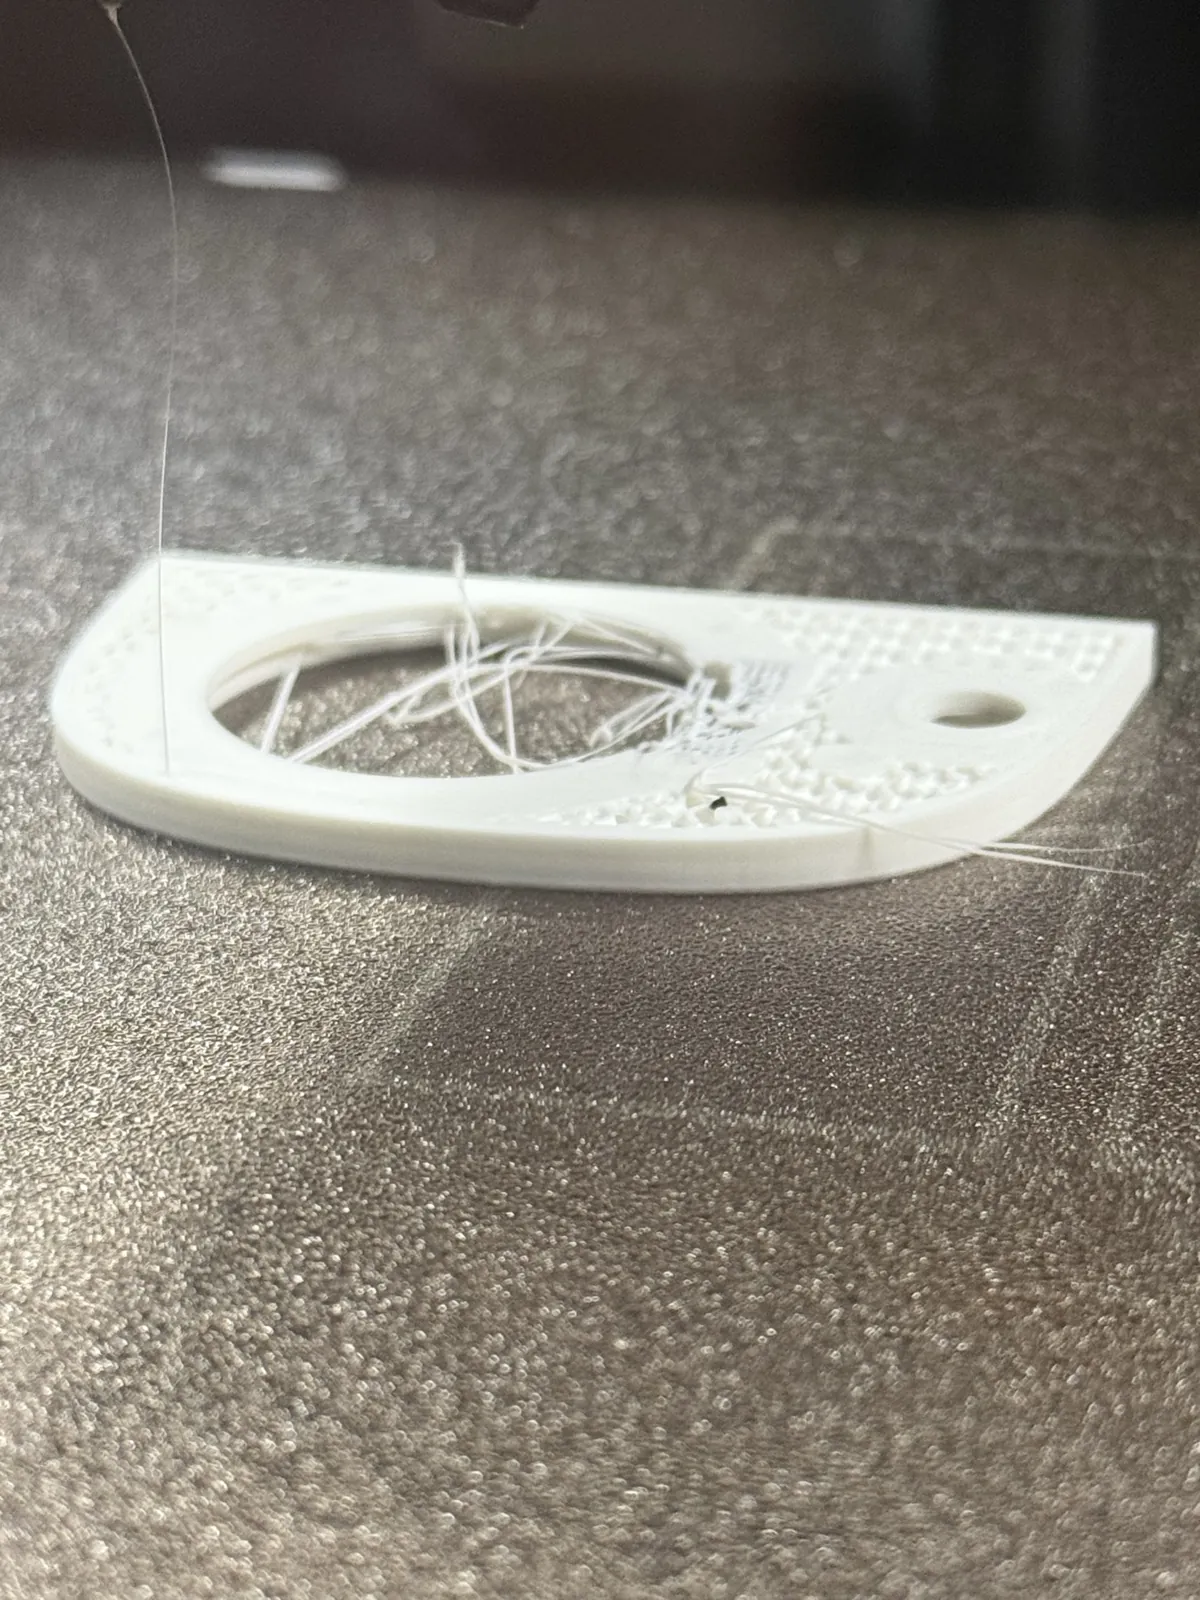
- Printed back-down, the thin lip that holds the screen glass was the roof of the screen pocket: a 1.45 mm ring printed over thin air. It strung and drooped round the window.
- The fix
- Print the face plate front-down. The lip becomes the first layers on the bed and every pocket opens upwards.
-
The screen's tab is a wedge
- What happened
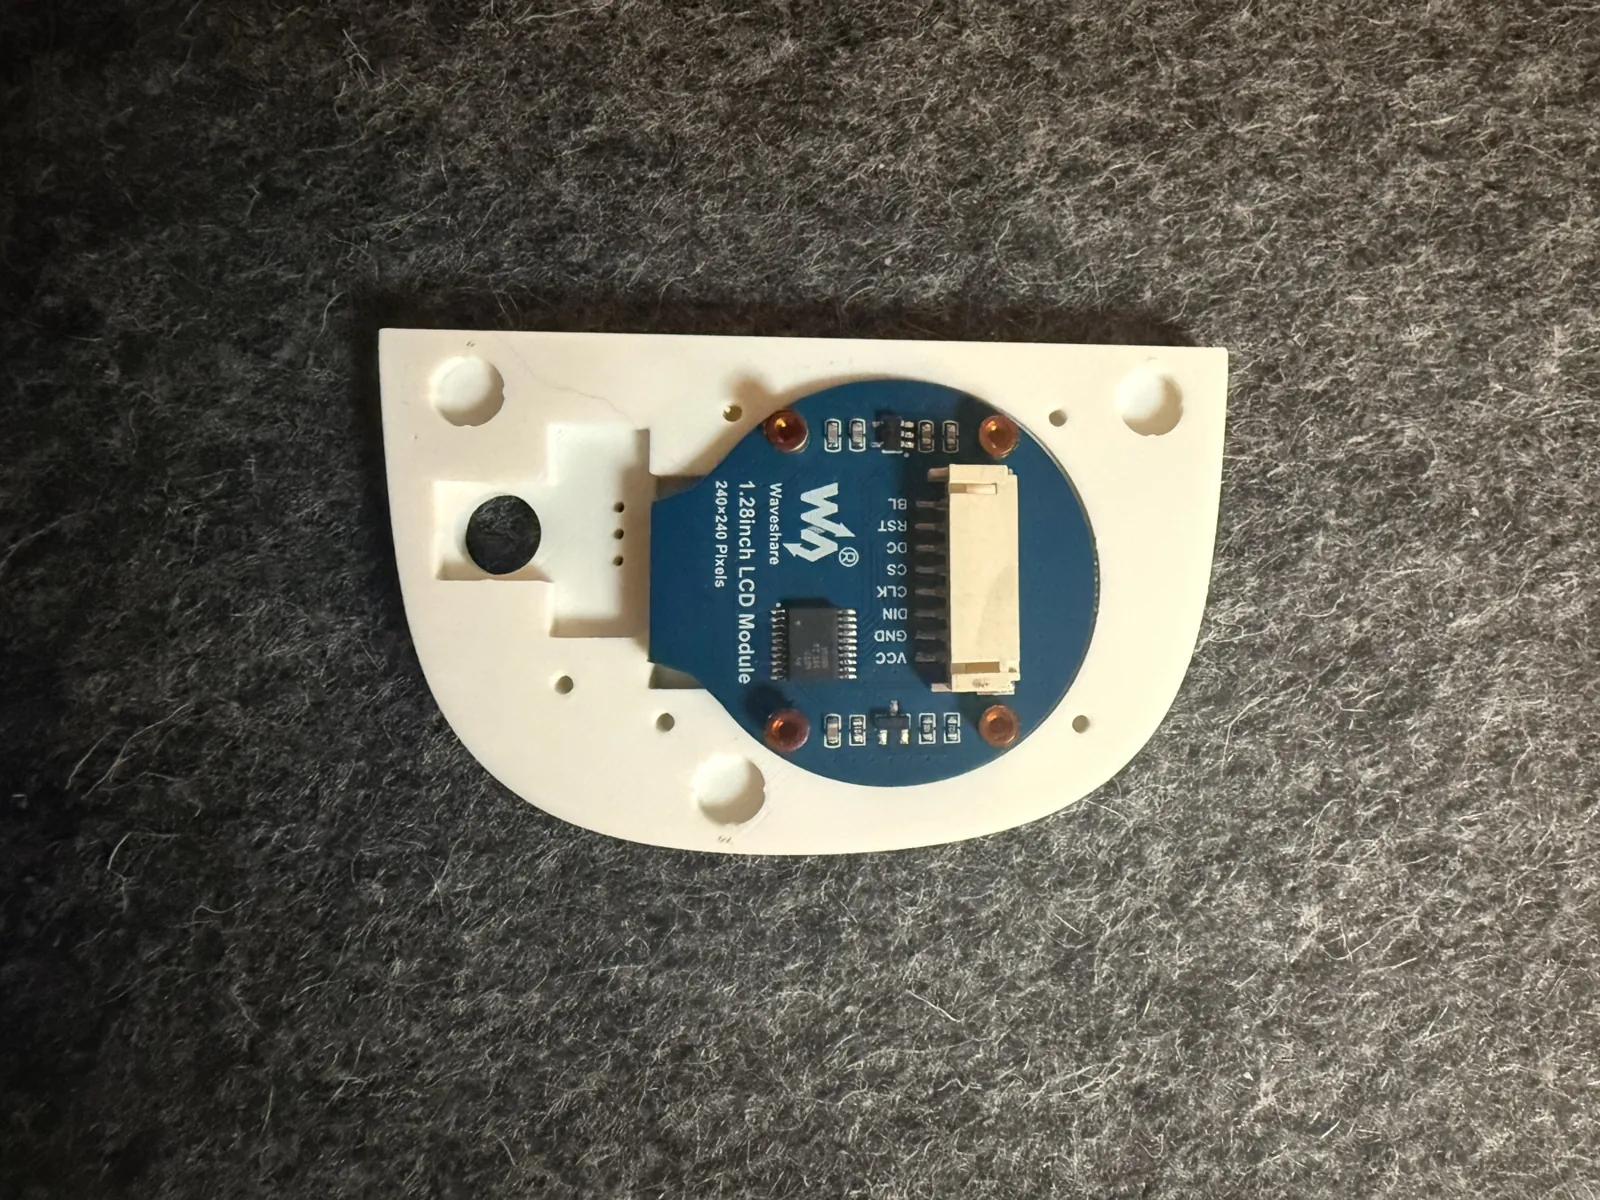
- We drew the board's connector tab as a rectangle. It's a tapered wedge, about 14.8 mm at the end and 21 mm where it meets the circle, so the pocket pinched it.
- The fix
- The pocket follows the wedge now, with 0.3 mm spare each side. On a plate already printed, shave the two corners with a craft knife.
-
The camera recess was 4 mm off
- What happened
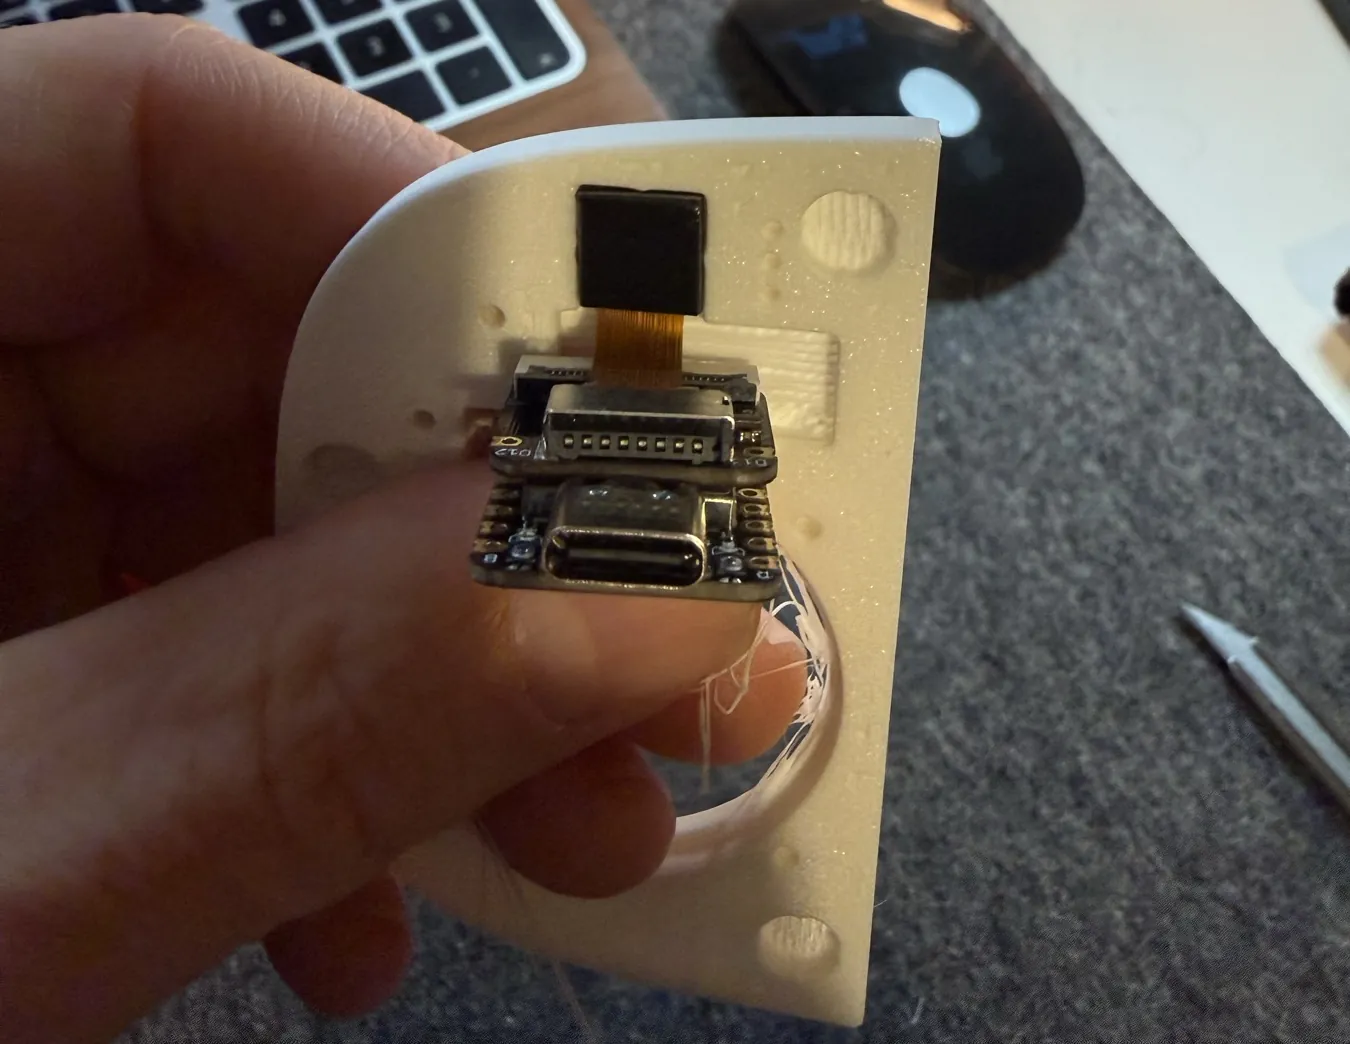
- We read the camera's position from a photo where it lay askew, and placed the lens 4 mm off the board's centreline. The ribbon actually runs straight down the middle.
- The fix
- Everything was re-placed on the centreline and re-checked against the hood.
-
Pockets 0.2 mm too tight
- What happened
- The screen pockets had 0.2 mm of clearance a side. Printed holes come out a little undersize, and the screen caught on the step where the board's pocket narrows to the glass.
- The fix
- 0.45 mm a side for the board and 0.5 mm for the glass. For a bought module in a printed pocket, start at 0.4 to 0.5 mm a side.
-
Two camera rings in one
- What happened
- Asking the new face plate file for its camera ring also ran the old file's camera ring, because both shared a name. The print came out as both rings merged, with an 8 mm bore.
- The fix
- The new parts have their own names. Reprint the ring if you printed it before the fix.
-
Hole blockers that blocked nothing
- What happened
- The build script's new "no support in holes" paint was applied after the triangles had already been written into the file, so none of it reached the print file.
- The fix
- Paint first, then write. A count of painted triangles in the finished file is now part of the checks.
-
Hairy feet
- What happened
- The feet came out with blue ooze hairs and clear strings on both uprights. All their support was inside the holes, and the support-material tips meant 62 nozzle switches.
- The fix
- The feet now print with no supports at all: 3 h 23 min and 31 g, down from 5 h 46 min and 55 g.
-
The face printed back to front
- What happened
- The face plate is designed flat and flipped into place, and the first print used the flat design. The outline is symmetric, so it dropped in, but the eye and camera were swapped and one magnet sat 16 mm from its partner.
- The fix
- The print file is now the fitted plate rotated onto its back: a rotation, not a mirror.
-
Magnets falling out
- What happened
- The face plate's magnet pockets gripped only 1.4 mm of each 2 mm magnet, and they dropped out.
- The fix
- Crush ribs at Ø5.92 over the full depth, with no lead-in. If one ever works loose, use two-part epoxy, not superglue.
-
Loose scraps inside the hood
- What happened
- The mesh audit found two loose 5 mm³ scraps of the old screw boss floating just above our rebuilt one. The slicer had merged them, so nothing printed wrong.
- The fix
- The new boss now runs high enough to swallow them.
-
Half-missing screw bosses
- What happened
- Cutting the face opening sliced the inner halves off the two front screw bosses that hold the hood to the head plate. Simon spotted the incomplete screw holes from underneath.
- The fix
- Both bosses rebuilt solid with one clean pilot hole each, and a web to the side wall that closes a slot the original had.
-
Supports that would have welded on
- What happened
- Where support stood on a part rather than the bed, it started in the part's own colour with no gap: plugs in the bill's hinge holes, bits on the body shells' floors, and 83 mm² of tree tips inside the hood.
- The fix
- Support standing on a part now keeps the same small gap as everywhere else.
-
Support towers you could knock over
- What happened
- Two 12 mm tall, 1.3 mm wide pencils of support stood on the head bracket to hold up two tiny fillets, and the hip brackets' corner tabs stood on 21 mm hollow tubes.
- The fix
- The fillets print fine alone, so support is blocked there. The hip brackets use grid-style support: solid columns about five times stiffer.
-
230 nozzle switches on one plate
- What happened
- The hip outputs had clear wisps of support material on them and a hairy prime tower. Their supports were built entirely from support material, so the printer swapped nozzles on almost every layer.
- The fix
- Support material for the top and bottom layers only: 230 switches down to 60. Damp support filament made it worse, so it now lives in a heated dryer.
-
A 10 mm bridge that sagged
- What happened
- Our first fix for the leg link's round recess was to let the roof bridge over it. The 10 mm bridge sagged and tangled.
- The fix
- A 0.24 mm skin closes the hole in the print file only, so the recess sits on a full disc of support. Push the skin out afterwards.
-
A prime tower bigger than the bed
- What happened
- The two head brackets each trimmed their own top layers, leaving tiny 0.008 mm steps between them. The prime tower printed on every step and grew to 116 mm square, off the edge of the bed.
- The fix
- Precise Z off for those two parts. The tower went back to 42 mm and the plate from 4 h 47 min to about 3 h.
-
Stepped panels on the stretched hood
- What happened
- Making the hood 10 mm taller moved only the points above one height. Where the back of the head curves in, the triangles across that line became flat, stepped panels. Simon spotted them in the slicer.
- The fix
- The stretch is now spread smoothly over 34 mm of height.
-
A triangular round hole
- What happened
- The support under the leg link's recess was only a thin ring round the open hole, so the roof's loops dragged and the 5 mm hole came out triangular.
- The fix
- See the sagging bridge above: it took one more failed print, then a different idea.
-
Rough undersides on the first leg links
- What happened
- The first parts off the printer used plain white supports, and the underside of the pocket at the leg link's tab tip came out rough.
- The fix
- Every supported part switched to supports topped with Support For PLA/PETG. That fixed the undersides and caused stringing of its own a day later.
-
A ledge inside the head plate
- What happened
- The first ledge for the face to sit on overlapped the grey head plate underneath by 99 mm³, and the traced face outline had a spike and stair-steps where an arch interrupts the rim.
- The fix
- The ledge stays above the head plate, and the outline was re-traced by angle round the face's centre and smoothed.
-
The face cut at the wrong depth
- What happened
- The first cut for the face opening went to the depth of the old eye recess, not the real front wall, so the old wall still covered the new windows. It showed up in a render.
- The fix
- Cut to the true front wall of Luwu's shell.